
-
- Probation and Confirmation
- Engagement Models at rtCamp
- Time Entry Policy
- Overtime Policy
- Device Discount Policy
- Time Off (Leave) Policy
- rtCamper's Referral Program
- rtCamper Health Insurance
- Business Travel
- Employee Grievance
- Policy on Prevention of Sexual Harassment (PoSH) at the workplace
- Anti-Corruption and Bribery Policy
- Anti-Discrimination and Anti-Racism Policy
- rtCamp Standards & Corrective Procedures
- Equal Employment Opportunity
Published on Aug 8, 2022
Time entries can include both billable and non-billable hours. For attendance purposes, we don’t look at the type of time logged, only the total hours recorded in the system are considered.
By logging time, individuals can showcase their productivity and ensure fair resource allocation, which ultimately supports a balanced work environment and smooth project delivery. It also helps in ensuring transparency and fair compensation for their time and efforts.
This guide provides detailed instructions on how to enter, manage and approve timesheets in ERPNext.
💡 We strongly recommend adding time entries daily to avoid loss of pay during payroll cycle.
Adding Time Entry
Viewing Your Timesheet
To view your Timesheet, log in to your ERP account and select the Next PMS app icon from the desk, or access it directly using this link.
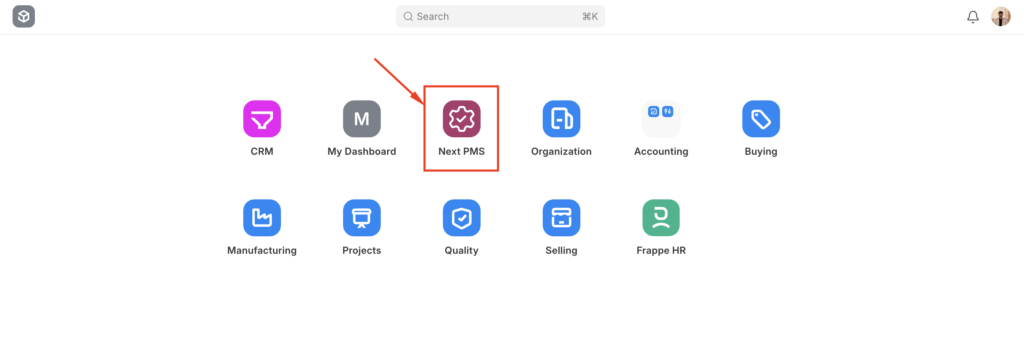
Adding Time Entries
You can view your time entries for the current week. If you missed adding time for a previous day, you can still log it on the current day when you log in.
Click “Add time” on the top right corner, or you can click the plus button (on hover) on the timesheet projects/task row to add the details of the hours you want to log.

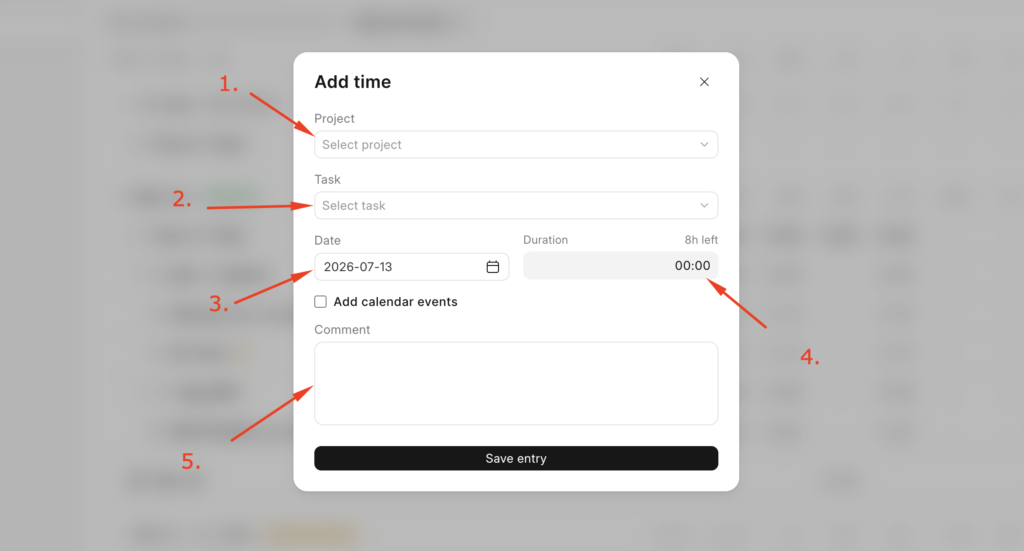
The window below will pop up on your screen for adding time entries. Follow the outlined steps to complete it.
Step 1: Select the project for which you intend to add time.
Step 2: Search for the task you have worked on.
Step 3: Select the date on which you intend to add time.
Step 4: Add the number of hours you have worked on a task.
Step 5: Under the comment section, add a brief about the tasks you have completed.
Step 6: To submit these details, click on the “Save entry” button at the bottom.
Submit Time Entries For Approval
You can submit time entries for approval on a weekly basis. Just note that once time entries are sent for approval, you cannot edit them.
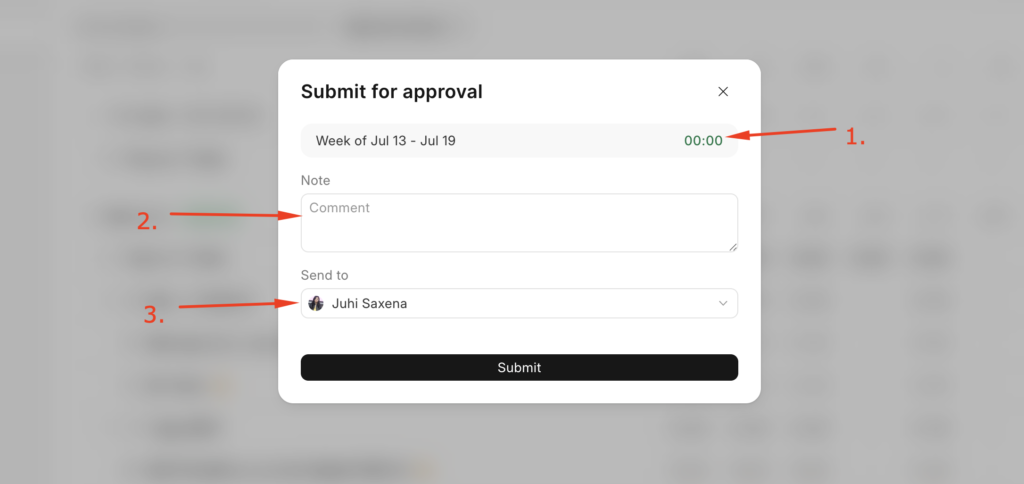
Click on the Share icon option of the timesheet as shown in the screenshot below, and you will receive a pop-up to “Submit for Approval.”

Step 1: Verify your total recorded hours for the week.
Step 2: Include a note for the reporting manager who will review your timesheet.
Step 3: Choose your reporting manager (your default manager is selected automatically).
Step 4: Click the “Submit” button at the bottom to finalize and send your timesheet.
Please Note:
- All-time entries should be made towards the end of the same day.
- The latest you can make them is the start of the next working day, which is usually 4 PM IST. In the case of Friday or a holiday on the next day, the deadline would be the next working day at 4 PM IST.
- Backdated time entries can be added only up to 5 working weekdays in the past.
- After a month ends, you will have just 1 working day to log time entry for the last day of the month.
Approving Time Entries
Navigate to the Timesheet app by clicking on the Next PMS app icon from the desk, or directly by using this link.
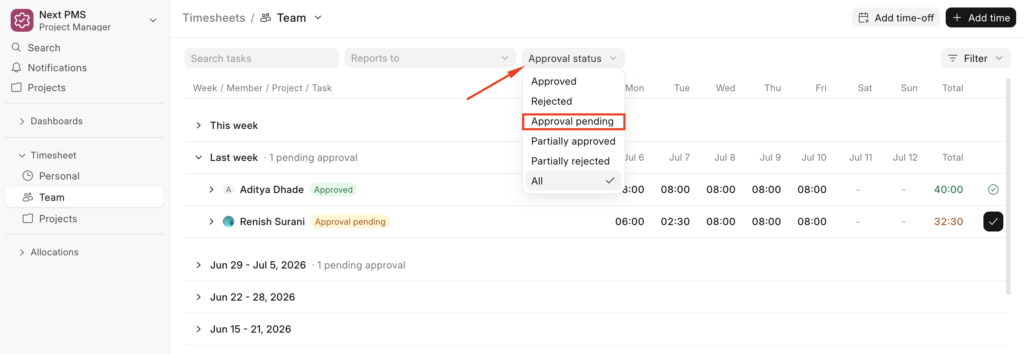
Go to the “Team” tab to review and approve or reject time entries for your team members.
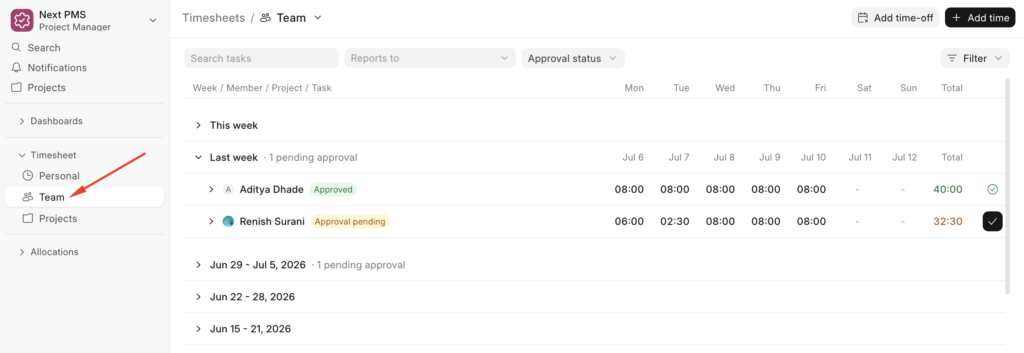
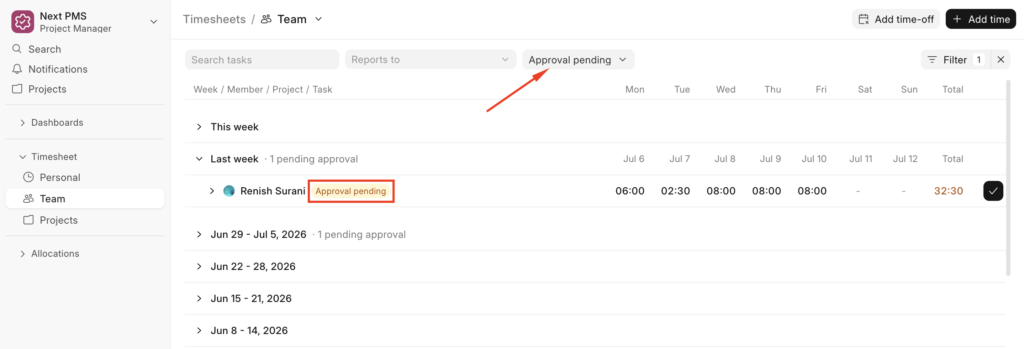
To view entries that are pending approval, simply apply the “Approval Pending” filter, as shown in the screenshot below. To view detailed time entries for each reportee, click on their name.
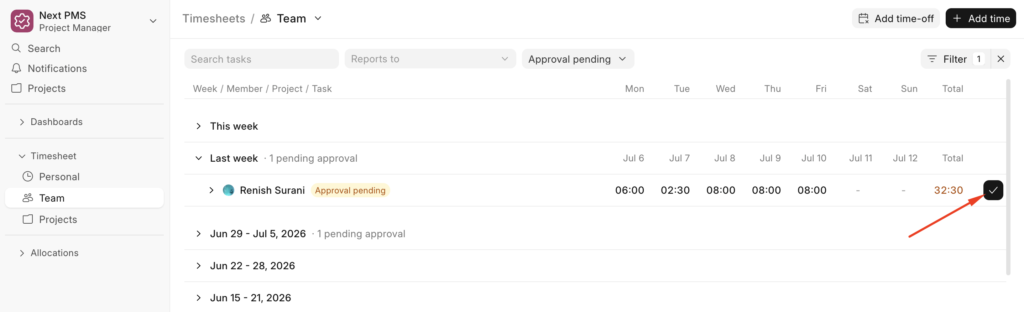
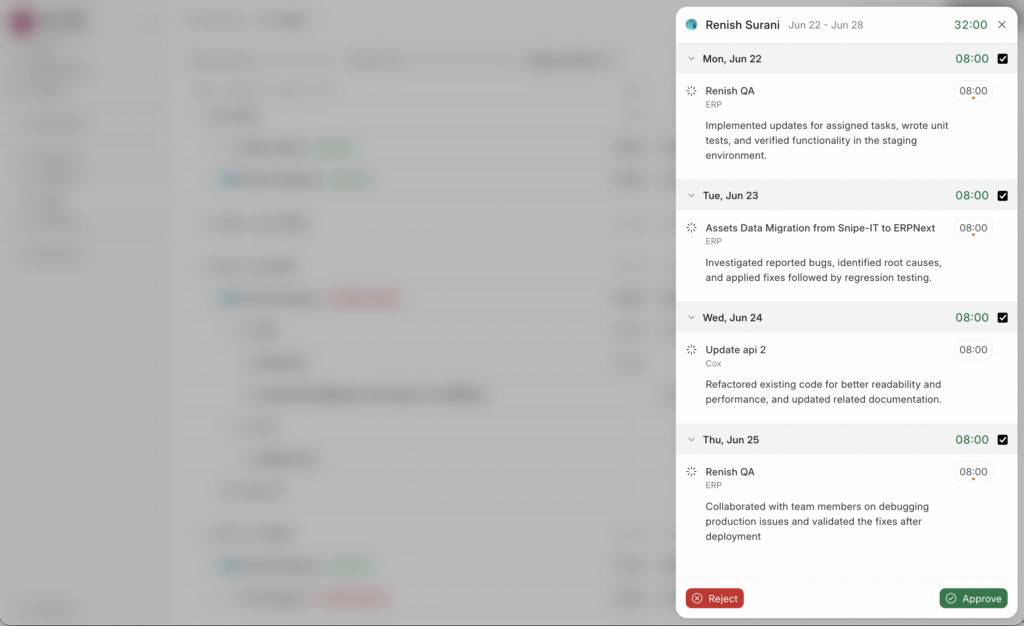
Upon clicking on the right ( ☑️) icon, you’ll be able to view the below window and check the time entries before approving/rejecting.
Cycle Considered for Payroll
Please note that the following periods are considered for salary calculations. To avoid having any missed time entries marked as unpaid leave, ensure that time entries are updated accordingly:
- IN-E 🇮🇳: 25th of the previous month to the 24th of the current month.
- US-C 🇺🇸: 1st to the last working day of the current month.
Last updated on Jul 13, 2026
Contributor

Joel
Joel Lobo
Director of HR